Encounters
The dungeons of Hammerwatch have several reoccurring encounters to aid you on you quest.
Contents
Elevators

Using an elevator will allow you to send your money and ore back to town. Money is taxed based on your current town hall level. The game will ask you for confirmation and show you how much you are actually sending back and at what tax rate.
If you activate the Miners' Strike Fountain fortune then all of the elevators will already be sent down, effectively creating an "all or nothing" scenario, as you would need to beat Thundersnow to receive any gold or ore from the run. The only other way to get anything back to town without winning is to have an Imp appear and allow you to send your gold to town tax free. This should not be relied upon, but can be a nice bonus if it happens in the Battlements.
Springs 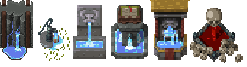

A spring can spawn on any floor but there is usually one per Act on average. Using it will fully restore you to your max health and mana as well as fill any empty potion charges you might have.
The only guaranteed spring in the game is directly before Thundersnow on floor 2 of the Battlements.
If you are seeking to get the Potion Gulpers achievement then the Unlimited Springs Fountain fortune can allow you to get all of them with a single fountain, all you have to do is drain a little mana or HP and drink a potion over and over, then refill at the spring.
If you are looking to get the Replenishers achievement then this fortune will not work, as the counter only ticks up when a spring is drained, and since the fortune prevents the spring from draining it will never tick up. It is recommended to start working on this achievement early as the highest tier of this achievement, use 500 wells, will take about 83 runs on average to complete if you make it all the way to the dragon each run, and use every fountain you come across.
Monoliths 
These can be found in any act. Interacting with one will grant you a temporary buff. The rewards is random there is no way of knowing what you will get.
Greater Insight cannot be gotten when you are at the max level you can reach in that run.
| Shrine buffs | |||
|---|---|---|---|
| Icon | Name | Effect | Duration |
| Protective Powers | -50% damage taken | 10 minutes | |
| Incredible Strength | x2 overall damage | 5 minutes | |
| Greater Insight | +100% experience | 15 minutes | |
| Vigorous Restoration | 20 HP a second | 8 minutes | |
| Endless Potential | Free skills | 4 minutes | |
| Gold Fever | +100% Gold gain | 15 minutes | |
| Rapid Blows | +50% Primary attack speed | 8 minutes | |
| Sundering Strikes | Ignore 50% of enemy Armor and Resistance | 8 minutes | |
| Nimble Limbs | +50% movement speed (Arena only) | 30 seconds | |
| Fortuitous Events | +5 Luck | 8 minutes | |

Imps 
Imps will show up in the dungeon at random times. After they have appeared they will stay for 1 minute before leaving. If you are able to get to them before they leave they will reward you with one of the following options.
- Send your gold to town tax free. Only happens for Non-Mercenaries.
- Give you some gold. The amount received increases in later acts.
- Give you some ore. The amount received increases in later acts.
- Give you some experience. The amount received increases in later acts. Only happens when you're not at max level.
- Give you some keys. You will always receive one bronze, silver, and gold key with a chance of also receiving an ace key.
- Give you a random item of any rarity.
 Remove all of your curses. Only happens when you have any curses.
There is approximately a 15% chance for an imp to spawn on any given floor, increased to 30% with the Plentiful Gifts Fountain fortune.
It is possible to have 0 imps spawn through an entire run, even with the fountain effect enabled, though if no floors are skipped the chance of the imp not spawning at all under these conditions would be: 0.7^16 = 0.3%.
The formula for how much gold the imp gives the player is:
Gold = ((2^Act * 1250) + (NG*5000)) * (Gold_Gain + (0.2 * NG))
The formula for how much ore the imp gives the player is:
amount = (int(pow(1.55f, act) * 3 + 0.5f) + int(g_ngp * 2.0f + 0.5f)
Shops

Shops can be found on the second or third floor of any Act in the tower and can only spawn once per act. In the Pyramid of Prophecy Shops can spawn on any floor, as there are no Red Rooms, skip portals, in the Pyramid.
Each shop has 5 items and can contain 2 more if you have have a Fancy Plume or have the Abundant Shops fortune from the Fountain.
These can both stack giving 9 item choices at a single shop. At any given shop you can only purchase 3 of the items shown. The Smirking Shopkeep drink allows to purchase an additional one.
It is rare, but you can sometimes find duplicate items in the shop, usually if you pick up Fancy Plume after looking at the shop the first time, or if you bought it from the shop. Note that if you already have an item, you can NOT buy it from the shop again. If an item is both on the floor and in the shop, you must therefore buy the item first, then pick it up off the ground to have both. Duplicate items like this DO count towards set bonuses, unlike attuning.
The Vendor's Coin will reduce the prices of items in the shops by 25%. The Smirking Shopkeep drink will increase the cost by 50% (only in dungeons).
The shops in each act give varying qualities of items. The following is the rarities that the shops can give in each act. Note that they have a chance to not give any items of the highest tier.
- Act 1: Common
- Act 2: Common, Uncommon
- Act 3: Common, Uncommon
- Act 4: Common, Uncommon, Rare
- Act 5: Common, Uncommon, Rare
Fancy Plume adds items to the shop based on the item rarities that are already in the shop. Not what it could potentially have. For example, If a shop in act 5 doesn't have any rare items and only has uncommon items, when the Fancy Plume is added to your inventory none of the extra items added to the shop will be rare.
Graveyard

These only appear in multiplayer, and can appear on any non-boss floor. Any player interacting with it will remove the all soul links in the group. A graveyard can only appear if there is a soul link (color) that has not been cleared before. Thus one person should link those that die until a graveyard appears, then a different person should be the linker.
The Battlements' floor 2, left exit path, has a very high chance (90%+) of having a graveyard if you meet the conditions of one. As this is right before Thundersnow, this can be a crucial piece of aid, making victory easier.
Portals and Red Rooms 
These rectangular looking portals are the level skippers of the game. They are always found in the first level of every act and only spawn after you defeated the boss of that respective chapter at least once on that New Game Plus level.
Example: For the portal to appear in the Mines, you must kill the Stone Guardian. For it to appear in the Prison, you must defeat the Warden once.
What happens when I go in?
You reach a room with a red cube that has a large chunk of HP. Once you hit it enemies will start spawning, with a new wave appearing every 10 seconds until the cube it killed.
Additionally, every time the cube loses a chunk of health (Reticle colors when hovering over it change from red back to green) it will summon an extra wave of enemies.
This means if you are able to quickly kill the pillar in only a few seconds, about 10 waves of enemies will spawn one after another with less than half a second in between waves.
The cube will gain attacks on each subsequent floor after the mines and will spawn exclusively enemies from the floor you are attempting to skip to.
Once the cube is destroyed, every enemy in the room is killed instantly. Also after destroying the cube, a selection of eight equippable items will spawn in a circle with rarities appropriate to the skipped floor.
Beating a Red Room for the first time and picking up the sphere where the cube was will unlock combo for your entire guild.
Magic Furnace

The magic furnace is occasionally found on floors throughout the tower. After interacting with the furnace, you can spend ore to craft an item from a list in the same way you can craft items from the magic anvil.
Much like with the magic anvil you will need the blueprints first before you have the option to craft an item.
Item Gambler 
The item gambler (named Unscrupulous Gambler) is an NPC that is located behind certain cracked walls in the tower. Interacting with the item gambler brings up an interface that lets you select items from your inventory to offer up for a single new item. The more items you offer, the higher the chance you have for receiving a rarer item.
You are only able to gamble one time with the Item Gambler, meaning after gambling with the with him you will not be able to gamble with him again for the rest of the run. Although rare, it is however possible to find more than one Item Gambler in a run, with which you'll be able to gamble once more.
With sealed cracks enabled you are still able to find the Item Gambler.
Blood Altar 

The blood altar is a small round table found randomly in the tower when playing with the Witch Hunter DLC, limited to one per run (however 1 per run is not guaranteed).
Using the altar will ask the player if they wish to sacrifice 10% of their current HP for a random buff that scales up with ng level being played.
(Effect + (Scaling * NG+ Level)).
This buff will persist across multiple runs, lasting until the player dies. Once the player dies, the buff is lost and the sacrificed HP will return.
Using the Altar multiple times will reduce max health by 10% multiplicatively.
| Buff Name | Effect | Scaling |
|---|---|---|
| Beast | Attack Power +30 | +3 |
| Chosen | Spell Power +30 | +3 |
| Immortal | Armor +25 | +2 |
| Fey | Resist +25 | +2 |
| Order | HP Regen +2 | +0.2 |
| Crone | Mana Regen +3 | +0.3 |
| Wiki Navigator | |
|---|---|
| Classes | Paladin • Priest • Ranger • Sorcerer • Thief • Warlock • Wizard • Gladiator • Witch Hunter |
| The Outlook | Apothecary • Bestiary • Blacksmith • Chapel • Companions (pets) • Fountain • Guild Hall • General Store |
| Forsaken Tower | Chests • Encounters • Items • Puzzles & Secrets |
| Pyramid of Prophecy • Arena • Retired Gladiator • Statues | |
| Legacy shop • Moon Temple | |
| Mechanics | Acts • Combat • Leveling Up • Money • New Game Plus • Mercenary mode • Completion Rewards |
| Enemies | Bosses • Aberrations • Beasts • Constructs • Undead |
| Modding | Commands • Packager • Starting a mod • Editor • Custom language files |
| Misc | Lore • Voice Lines • Patch Notes • Troubleshooting |