Difference between revisions of "Puzzlesecrets"
Playmoarnow (talk | contribs) m |
(→General Strategy and Sample Lights Out Patterns and Solutions) |
||
| (14 intermediate revisions by 3 users not shown) | |||
| Line 27: | Line 27: | ||
**A button in the middle of a 5 x 5 grid with ~1/2 of the buttons missing | **A button in the middle of a 5 x 5 grid with ~1/2 of the buttons missing | ||
**A button in the middle of a smaller 3 x 3 grid | **A button in the middle of a smaller 3 x 3 grid | ||
| − | ***Each spot on the floor has a 50% | + | ***Each spot on the floor has a 50% chance to pop up in the time before generating the reward. |
| + | Some of the smaller RNG rooms don't always give an item, however the largest one (pictured on the right) can give all item types, with commons appearing on the bottom, uncommons on the right, rares at the top, and epic or legendary on the left. | ||
| + | *A legendary item can be obtained when all but 4 (or less) of the buttons are activated. Epic at 5 or 6 away. | ||
| + | |||
| + | |||
| + | For the Full 5 x 5 grid, the probability of the various rarity of items is as follows (rounded to 2 decimal places): | ||
| + | |||
| + | {| class="wikitable" | ||
| + | |- | ||
| + | | Legendary | ||
| + | | 0.08% | ||
| + | |- | ||
| + | | Epic | ||
| + | | 1.06% | ||
| + | |- | ||
| + | | Rare | ||
| + | | 6.45% | ||
| + | |- | ||
| + | | Uncommon | ||
| + | | 65.36% | ||
| + | |- | ||
| + | | Common | ||
| + | | 26.99% | ||
| + | |} | ||
==Puzzles== | ==Puzzles== | ||
| Line 57: | Line 80: | ||
This little head-scratcher can be difficult for those who are inexperienced with the puzzle and often lead to reduced rewards. <br> | This little head-scratcher can be difficult for those who are inexperienced with the puzzle and often lead to reduced rewards. <br> | ||
Brute force will not get you through this puzzle with a good reward!<br> | Brute force will not get you through this puzzle with a good reward!<br> | ||
| − | + | ||
| − | Each time you step on a panel, it and | + | ====Understanding the puzzle==== |
| − | The objective is to have all the panels lit up. | + | *The board is a 3x3 grid. |
| − | You are allowed to make a few mistakes and still get the best reward, but only 3 or 4. | + | *Each panel has two states: on or off. |
| + | *Each time you step on a panel, it toggles its state and the state of its immediate neighbors (up, down, left, right). If they were off, they are now on. If they were on, they are now off. | ||
| + | *There is also a treasure spawn panel to the right | ||
| + | *The objective is to have all the panels lit up. | ||
| + | *You are allowed to make a few mistakes and still get the best reward, but only 3 or 4. | ||
| + | |||
| + | ==== General Strategy and Sample Lights Out Patterns and Solutions ==== | ||
| + | There are certain states or patterns in the 3x3 Lights Out puzzle that are easier to solve without a mathematical background. Recognizing these patterns can simplify the process. These patterns can be memorized using number or dice patterns. Here are some examples: | ||
| + | |||
| + | {| class="wikitable" | ||
| + | ! Pattern !! Description !! Solution !! Visual Representation of Pattern | ||
| + | |- | ||
| + | | Empty Board || All Lights Off || Perform a number 5 dice pattern. Step once in the middle and once in each corner to light the entire board. || [[File:Empty_lightsout.jpg|100px]] | ||
| + | |- | ||
| + | | Number 1 Dice Pattern || Center Lit || Step on every panel except for the middle to turn all the lights on. || [[File:One_lights.jpg|100px]] | ||
| + | |- | ||
| + | | Number 2 Dice Pattern || Opposite Corners Lit || Step on every panel except for the lit corners. This will turn all the lights on. | ||
| + | |- | ||
| + | | Number 3 Dice Pattern || Diagonal Lit || Step on the two corners that are not lit (forming the reverse of the number 2 dice pattern). || [[File:Three_lights_r.jpg|100px]] | ||
| + | |- | ||
| + | | Number 4 Dice Pattern || All 4 Corners Lit || Step once in the middle (creating a number 1 dice pattern). || [[File:Four_lights.jpg|100px]] | ||
| + | |- | ||
| + | | Number 5 Dice Pattern || All 4 Corners and the Center Lit || Step on the 4 panels that are not lit, forming a diamond shape. | ||
| + | |- | ||
| + | | Number 6 Dice Pattern || Top and Bottom or Both Sides Lit || Step on all 3 panels of the two lit edges, and then on the center panel. || [[File:Six_lights_h.jpg|100px]] [[File:Six_lights_v.jpg|100px]] | ||
| + | |- | ||
| + | | Cross Pattern || Everything Except Corners Lit || Step on the four corners (creating a number 4 dice pattern). || [[File:Cross.jpg|100px]] | ||
| + | |- | ||
| + | | Line Pattern || Straight Line Down the Middle (Vertical or Horizontal) || Step on the center panel next to each side of the line. || [[File:Line_lights_v.jpg|100px]] | ||
| + | |- | ||
| + | | Diamond Pattern || All four compass points lit, but nothing else || Step on every panel exactly once. || [[File:Diamond_lights.jpg|100px]] | ||
| + | |} | ||
| + | |||
| + | ====Alternatives==== | ||
There is also a 5 x 5 version of this puzzle in the Archives that can appear extremely rarely. | There is also a 5 x 5 version of this puzzle in the Archives that can appear extremely rarely. | ||
| + | |||
| + | ====Rewards==== | ||
From highest to lowest the 3 x 3 rewards are: | From highest to lowest the 3 x 3 rewards are: | ||
| − | *Silver locked chest | + | *Silver locked chest (0-2 mistakes) |
| − | *Bronze locked chest | + | *Bronze locked chest (2-4 mistakes) |
| − | *Unlocked chest | + | *Unlocked chest (4-6 mistakes) |
| − | *Bronze key | + | *Bronze key (6-8 mistakes) |
| − | *Food | + | *Gem, ore, or Food (10+ mistakes) |
From highest to lowest the 5 x 5 rewards are: | From highest to lowest the 5 x 5 rewards are: | ||
| Line 76: | Line 134: | ||
*Silver locked chest | *Silver locked chest | ||
*Bronze locked chest | *Bronze locked chest | ||
| − | * | + | *Unlocked chest |
| − | * | + | *Bronze key |
| + | *Gem or Ore | ||
| + | *Food | ||
===Symbol Memory=== | ===Symbol Memory=== | ||
| Line 91: | Line 151: | ||
*Bronze locked chest | *Bronze locked chest | ||
*Unlocked chest | *Unlocked chest | ||
| − | *Bronze Key | + | *Bronze Key |
*Apple | *Apple | ||
| Line 97: | Line 157: | ||
[[File:Order.jpg|200px|frameless|right]] | [[File:Order.jpg|200px|frameless|right]] | ||
This puzzle tasks you with guessing the order to press the 4 buttons. Each wrong guess will drop a bunch of bombs in the room and explode shortly after.<br> | This puzzle tasks you with guessing the order to press the 4 buttons. Each wrong guess will drop a bunch of bombs in the room and explode shortly after.<br> | ||
| − | You are allowed | + | You are allowed 3 wrong guesses while still being eligible for the best reward.<br> |
| − | + | There are no hints for this "puzzle" on the floor or in the puzzle itself, being based purely on RNG. Guessing is your only option.<br> | |
| − | Even if you guess wrong every time, so long as you don't repeat failed attempts you will beat the puzzle in 7 attempts (6 | + | Even if you guess wrong every time, so long as you don't repeat failed attempts you will beat the puzzle in 7 attempts (6 fails and 1 win). |
From highest to lowest the rewards are: | From highest to lowest the rewards are: | ||
| Line 110: | Line 170: | ||
[[File:Path.jpg|200px|frameless|right]] | [[File:Path.jpg|200px|frameless|right]] | ||
| − | This is a 5 x 5 puzzle that appears in the [[Acts#Act_4.2C_The_Archives|Archives]] where, once you press the button a path will be lit up tile by tile and it's your job to remember and repeat it. <br> | + | This is a 5 x 5 puzzle that appears in the [[Acts#Act_4.2C_The_Archives|Archives]] and [[Moon Temple]] where, once you press the button a path will be lit up tile by tile and it's your job to remember and repeat it. <br> |
You are timed upon stepping onto a tile so doing the puzzle slowly will not fly. The path can loop back on itself and if you misstep once you lose.<br> | You are timed upon stepping onto a tile so doing the puzzle slowly will not fly. The path can loop back on itself and if you misstep once you lose.<br> | ||
From highest to lowest the rewards are: | From highest to lowest the rewards are: | ||
*Golden locked chest | *Golden locked chest | ||
| − | * | + | *Silver locked chest |
| − | * | + | *Bronze locked chest |
*Wooden Chest | *Wooden Chest | ||
*Apple | *Apple | ||
<center>{{Template:BaseNav}}</center> | <center>{{Template:BaseNav}}</center> | ||
Latest revision as of 19:41, 10 May 2024
Prefabrications (or prefabs for short) are structures such as puzzles, traps, secrets, or simply even large rooms, that are pre-assembled and slightly randomized to make the random map generation more simple. These make up every generated map (the three floors of each act, minus the boss room). Any repeated structure can easily be identified as a prefab.
Contents
Look for these breakable walls and secret corridors throughout your adventures to find items and treasure!
Act 1, The Mines
Act 2, The Prison
Act 3, The Armory
Act 4, The Archives
Act 5, The Chambers
Secret Rooms
You can find one of three different things behind cracked wall secret rooms:
- A chest and some gold
- RNG button, 3 types, each generating a random reward:
- A button in the middle of a 5 x 5 grid
- A button in the middle of a 5 x 5 grid with ~1/2 of the buttons missing
- A button in the middle of a smaller 3 x 3 grid
- Each spot on the floor has a 50% chance to pop up in the time before generating the reward.
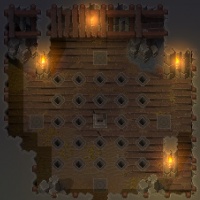
Some of the smaller RNG rooms don't always give an item, however the largest one (pictured on the right) can give all item types, with commons appearing on the bottom, uncommons on the right, rares at the top, and epic or legendary on the left.
- A legendary item can be obtained when all but 4 (or less) of the buttons are activated. Epic at 5 or 6 away.
For the Full 5 x 5 grid, the probability of the various rarity of items is as follows (rounded to 2 decimal places):
| Legendary | 0.08% |
| Epic | 1.06% |
| Rare | 6.45% |
| Uncommon | 65.36% |
| Common | 26.99% |
Puzzles
Puzzles will be spread throughout your adventure. Solve them to claim prizes from gold to keys to chests containing powerful items!
There are several different types, some are self-explanatory, but a few don't let blind guessing through.
The most common puzzles involve spike traps and projectiles. These are easily solvable given a little pattern recognition skill, then there are the other types which can become a mini-game in their own right.
Spoiler Alert! If you do not wish have these puzzles revealed and explained, stop here.
Lightning Run
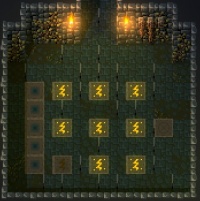
Should you see a 3 x 3 pattern of squares on the floor with lightning bolts, congratulations, you have met the lightning run!
From the moment you step on the blank tile, the timer starts. Race to the next unlit tile as many times as you can before the timer finishes.
As you touch the unlit tiles, the 5 tiles on the left hand side of the 3 x 3 grid will start light up one by one. This indicates the level of prize you will receive.
The highest prize is tough to achieve as there is little margin for error.
Having high movement speed will be a great advantage here. A tip is that the next unlit tile must be 1 away from the previous unlit tile, and can be diagonally from the previous one.
From highest to lowest the rewards are:
- Silver locked chest
- Bronze locked chest
- Unlocked chest
- Bronze key
- Apple
The locked chests need keys, so if you don't have any, try not to complete the puzzle to the highest level or you will miss out on your reward!
Lights Out
This little head-scratcher can be difficult for those who are inexperienced with the puzzle and often lead to reduced rewards.
Brute force will not get you through this puzzle with a good reward!
Understanding the puzzle
- The board is a 3x3 grid.
- Each panel has two states: on or off.
- Each time you step on a panel, it toggles its state and the state of its immediate neighbors (up, down, left, right). If they were off, they are now on. If they were on, they are now off.
- There is also a treasure spawn panel to the right
- The objective is to have all the panels lit up.
- You are allowed to make a few mistakes and still get the best reward, but only 3 or 4.
General Strategy and Sample Lights Out Patterns and Solutions
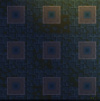
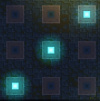
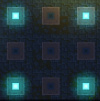
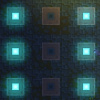
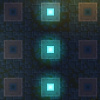
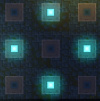
There are certain states or patterns in the 3x3 Lights Out puzzle that are easier to solve without a mathematical background. Recognizing these patterns can simplify the process. These patterns can be memorized using number or dice patterns. Here are some examples:
Alternatives
There is also a 5 x 5 version of this puzzle in the Archives that can appear extremely rarely.
Rewards
From highest to lowest the 3 x 3 rewards are:
- Silver locked chest (0-2 mistakes)
- Bronze locked chest (2-4 mistakes)
- Unlocked chest (4-6 mistakes)
- Bronze key (6-8 mistakes)
- Gem, ore, or Food (10+ mistakes)
From highest to lowest the 5 x 5 rewards are:
- Ace Key (perfect)
- Gold locked chest
- Silver locked chest
- Bronze locked chest
- Unlocked chest
- Bronze key
- Gem or Ore
- Food
Symbol Memory
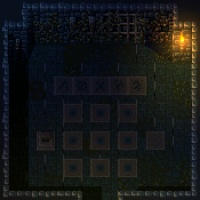
This puzzle has you test your memory. Once you press the button 5 different symbols will appear in the 3 x 3 grid randomly, but there will always be 3 Λ's, 2 O's, 2 X's, 1 Y and 1 Z.
Each symbol type will light up in the order you should press them. You have unlimited(?) time to complete this puzzle, but you cannot reset it and try again.
If you feel like this puzzle is too troublesome taking a screenshot will allow you to easily solve it.
From highest to lowest the rewards are:
- Silver locked chest
- Silver Key
- Bronze locked chest
- Unlocked chest
- Bronze Key
- Apple
Guess The Order
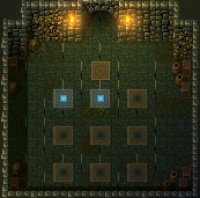
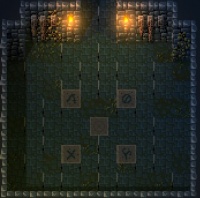
This puzzle tasks you with guessing the order to press the 4 buttons. Each wrong guess will drop a bunch of bombs in the room and explode shortly after.
You are allowed 3 wrong guesses while still being eligible for the best reward.
There are no hints for this "puzzle" on the floor or in the puzzle itself, being based purely on RNG. Guessing is your only option.
Even if you guess wrong every time, so long as you don't repeat failed attempts you will beat the puzzle in 7 attempts (6 fails and 1 win).
From highest to lowest the rewards are:
- Silver locked chest
- Bronze locked chest
- Unlocked chest
- Bronze Key
Remember the Path
This is a 5 x 5 puzzle that appears in the Archives and Moon Temple where, once you press the button a path will be lit up tile by tile and it's your job to remember and repeat it.
You are timed upon stepping onto a tile so doing the puzzle slowly will not fly. The path can loop back on itself and if you misstep once you lose.
From highest to lowest the rewards are:
- Golden locked chest
- Silver locked chest
- Bronze locked chest
- Wooden Chest
- Apple

